Navigation(AAC)+BottomNavigationViewでItemとFragmentを簡単に紐づける
Navigationコンポーネントを利用することで、単純なボタンから始まり、アプリバー、ナビゲーションドロワーなどからの画面遷移を簡単に実装することができます。
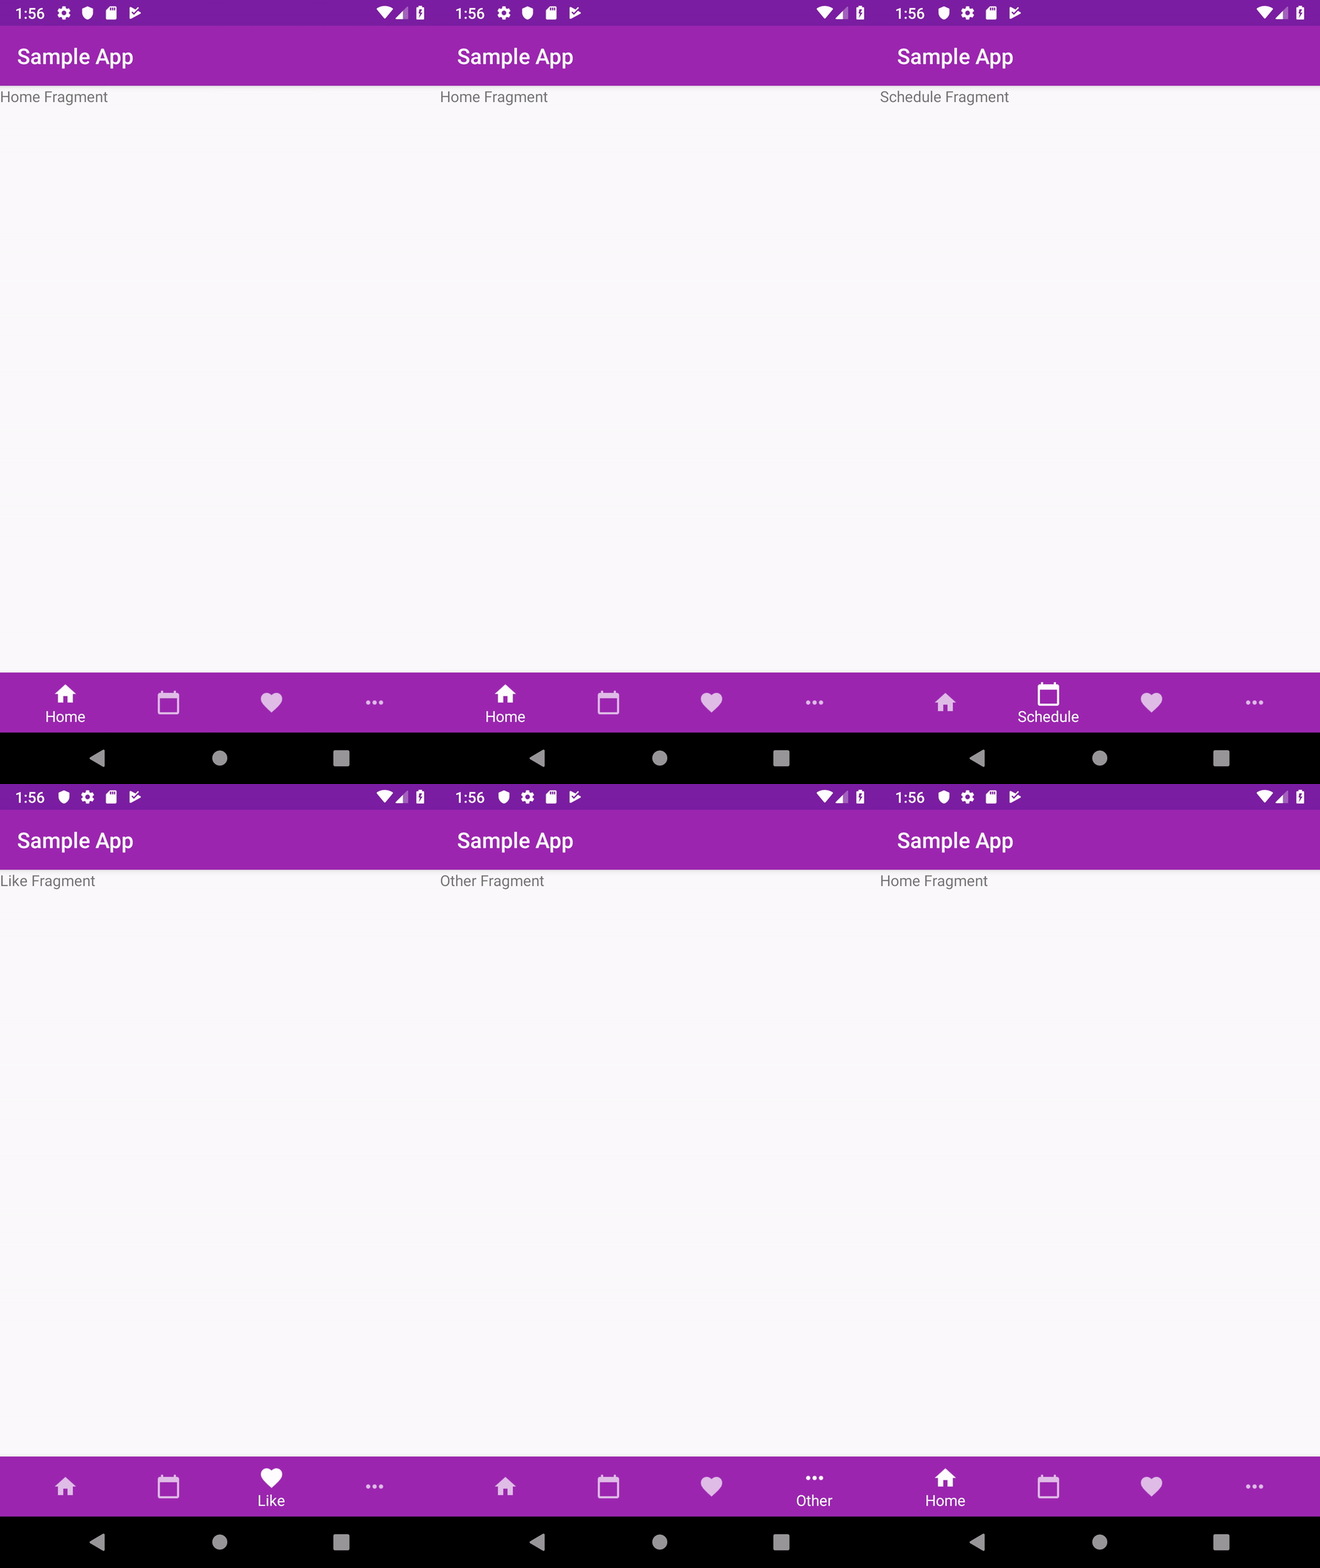
今回は、Navigationコンポーネントを利用し、BottomNavigationViewのそれぞれのアイテムとFragmentを紐づけていい感じに表示しよう、というのが目的です。
AFragmentのボタンをクリックするとBFragmentへ遷移する~みたいなのは今回の実装に含みません。
実装する場合は、下記のリンクがとても参考になるので一読推奨。
Usage
1.ライブラリのダウンロード
Navigationコンポーネントを利用するために必要なライブラリをdependenciesに追記。
・build.gradle
    implementation "android.arch.navigation:navigation-fragment:1.0.0"
    implementation "android.arch.navigation:navigation-ui:1.0.0"
    implementation "android.arch.navigation:navigation-fragment-ktx:1.0.0"
    implementation "android.arch.navigation:navigation-ui-ktx:1.0.0"
2.BottomNavigationViewと紐づけるFragmentの作成
実際、後述するナビゲーショングラフの作成の時にFragmentの作成もまとめてできますが、如何せんテンプレートコードでFragmentが実装されるため不要なコードもくっついてきます。
ので、事前に自身が必要なFragmentクラスとレイアウト用のXMLを定義しておきましょう。
今回使うFragment
- HomeFragment
- ScheduleFragment
- LikeFragment
- OtherFragment
3.ナビゲーショングラフの作成
ナビゲーショングラフは、アプリの画面ごと遷移関係を定義するためのファイルとなります。
まずは、res配下にnavigationディレクトリを作成し、そこにXMLを作成します。(名前は任意)
・res/navigation/app_navigation.xml
<?xml version="1.0" encoding="utf-8"?>
<navigation xmlns:android="http://schemas.android.com/apk/res/android"
            xmlns:app="http://schemas.android.com/apk/res-auto"
            xmlns:tools="http://schemas.android.com/tools"
            android:id="@+id/app_navigation.xml"
            app:startDestination="@id/homeFragment">

    <fragment android:id="@+id/homeFragment"
              android:name="com.example.hamp.HomeFragment"
              android:label="fragment_home"
              tools:layout="@layout/fragment_home"/>

    <fragment android:id="@+id/scheduleFragment"
              android:name="com.example.hamp.ScheduleFragment"
              android:label="fragment_schedule"
              tools:layout="@layout/fragment_schedule"/>

    <fragment android:id="@+id/likeFragment"
              android:name="com.example.hamp.LikeFragment"
              android:label="fragment_like"
              tools:layout="@layout/fragment_like"/>

    <fragment android:id="@+id/otherFragment"
              android:name="com.example.hamp.OtherFragment"
              android:label="fragment_other"
              tools:layout="@layout/fragment_other"/>
</navigation>
・Designタブで見たときの状態

4.BottomNavigationViewのmenu resource内のItemたちのId変更
BottomNavigationViewのアイテムとFragmentを紐づけるためには、ナビゲーショングラフのXMLで定義したFragmentのidと、menu resourceで定義しているアイテムのidを同一にしておく必要があります。
同一にしておくことでよしなに紐づけてくれます。
・res/menu/bottom_navigation_item.xml
<?xml version="1.0" encoding="utf-8"?>
<menu xmlns:android="http://schemas.android.com/apk/res/android">

    <item
            android:id="@+id/homeFragment"
            android:icon="@drawable/baseline_home_white_24dp"
            android:title="Home"/>
    <item
            android:id="@+id/scheduleFragment"
            android:icon="@drawable/baseline_calendar_today_white_24dp"
            android:title="Schedule"/>

    <item
            android:id="@+id/likeFragment"
            android:icon="@drawable/baseline_favorite_white_24dp"
            android:title="Like"/>

    <item
            android:id="@+id/otherFragment"
            android:icon="@drawable/baseline_more_horiz_white_24dp"
            android:title="Other"/>

</menu>
4.NavHostFragmentをレイアウトファイルに定義する
レイアウトファイルにNavHostFragmentを追加します。
先程定義したナビゲーショングラフを実際にレイアウトとして利用するために、属性app:navGraphに設定します。
・res/layout/activity_main.xml
<?xml version="1.0" encoding="utf-8"?>
<tools:FrameLayout
        xmlns:android="http://schemas.android.com/apk/res/android"
        xmlns:app="http://schemas.android.com/apk/res-auto"
        android:layout_width="match_parent"
        android:layout_height="match_parent" xmlns:tools="http://schemas.android.com/tools"
        >

    <fragment
            android:name="androidx.navigation.fragment.NavHostFragment"
            android:layout_width="match_parent"
            android:layout_height="match_parent"
            app:navGraph="@navigation/app_navigation"
            app:defaultNavHost="true"
            android:id="@+id/navHostFragment"/>

    <android.support.design.widget.BottomNavigationView
            android:id="@+id/bottom_navigation"
            android:layout_width="match_parent"
            android:layout_height="wrap_content"
            android:layout_gravity="bottom"
            android:background="@color/colorPrimary"
            app:itemIconTint="@drawable/bottom_navigation_colors"
            app:itemTextColor="@drawable/bottom_navigation_colors"
            app:menu="@menu/bottom_navigation_item" />

</tools:FrameLayout>
5.実行画面
4まで終われば完成です。実行してみると下記の様に選択するItemごとにFragmentが切り替わっているのが分かります。
